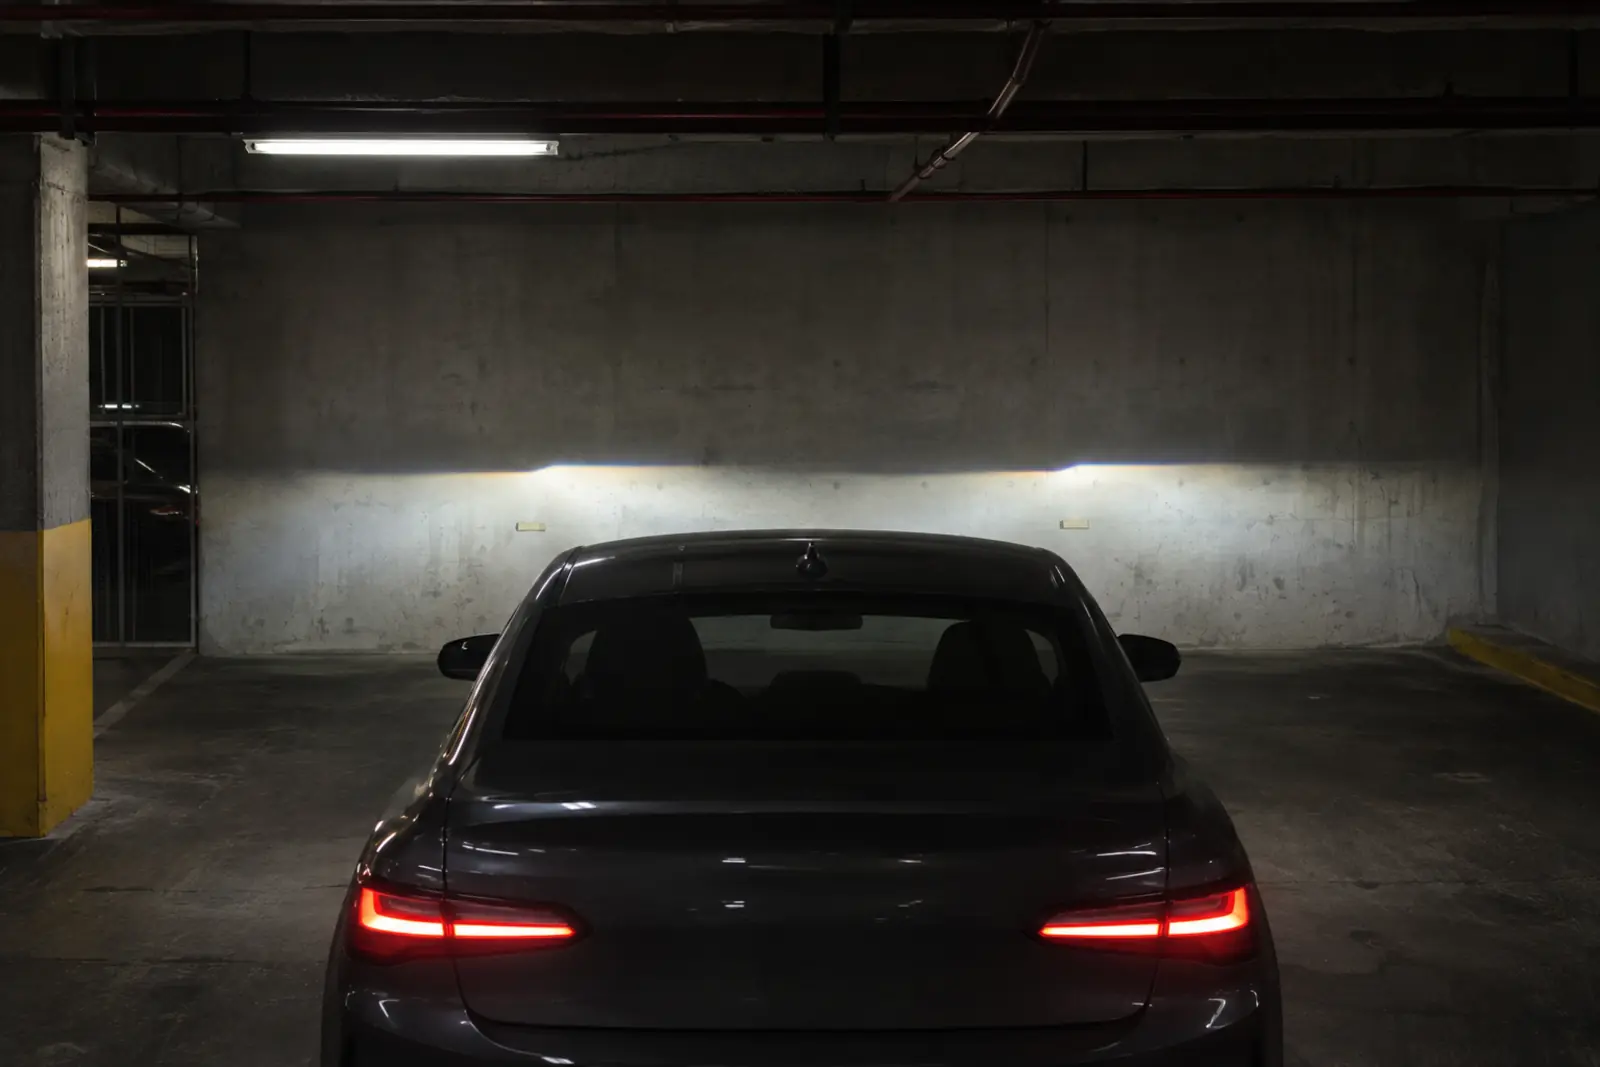
To aim headlights at home, park the vehicle on level ground about 25 feet from a flat wall, turn on the low beams and use the lamp adjusters to bring the top edge of each beam slightly below the height of the lamp center. Follow the owner's manual where it gives a different target. New York VTL 375(2)(b) requires lamps to avoid dangerous glare and says a beam may not rise above the lamp center at 25 feet ahead or above 42 inches at 75 feet ahead. Poor aim shortens your useful view of the road and can dazzle other drivers, and it matters even on modern headlights: IIHS tests vehicles as delivered, without adjusting their headlamps first.
How to aim headlights at home: step by step
This is the common wall method described in do-it-yourself guides such as Family Handyman's headlight adjustment guide. It works for the low beam on most vehicles, but the owner's manual comes first. Some vehicles specify a different distance, a different loading condition or a gauge-based procedure.
- Prepare the vehicle. Top up the tire pressure and keep the fuel tank at least half full, so the vehicle sits about as it does in normal driving. Push down on a solid part of the body a few times so the suspension settles.
- Park square to a wall at 25 feet. Use level ground and a smooth, flat, vertical surface such as a garage wall or a sheet of plywood. Do this after dark or in a dim garage so the beam pattern is easy to see.
- Mark the lamp centers. Measure from the ground to the center of each low-beam area on the lens and note the height.
- Mark the wall. Run a horizontal strip of painter's tape at the same height as the lamp centers. This is your lamp-center line, the upper limit named in the New York rule at 25 feet.
- Add the target lines. Family Handyman places the target for the top edge of the driver-side beam 4 inches below the lamp-center line and the passenger-side target 2 inches below it, then fine-tunes from there. If your manual gives other figures, use those.
- Find the adjusters. They are behind or on top of each assembly. Most vehicles have one adjuster for vertical aim, and some add a separate one for horizontal aim. The manual shows where they are and which tool turns them.
- Turn on the low beams and adjust one lamp at a time. Raise or lower the beam until its top edge meets the target line.
- Recheck. Bounce the vehicle again and confirm both beams still sit on their target lines.
On most vehicles, adjusting the low beam also moves the high beam, so there is usually no separate high-beam adjustment. Do not assume that the brightest spot should sit directly on a lamp-center mark: beam patterns and aiming procedures vary, and the statutory limits do not give every detail needed to aim a particular headlamp. If the manual does not explain the process clearly, have a shop check it.
Headlight aiming chart: what the numbers mean
A headlight aiming chart is a set of measurements for a wall or screen: the height of the lamp centers, the distance to the wall, and where the top edge of the beam should fall. Vehicle makers publish their own values, so a generic chart is only a starting point. The New York rule gives two fixed reference points for the low beam:
- At 25 feet: the beam may not rise higher than the lamp center.
- At 75 feet: the beam may not rise higher than 42 inches.
- How it is measured: beam height is measured from the plane on which the vehicle stands, and distance is measured from the lamp projecting the light.
These figures are upper limits, not a complete aiming procedure. A beam can satisfy both and still be aimed so low that it shortens your view, which is why the manufacturer's target is the one to follow. For the full statute, see VTL section 375. The broader New York lighting law guide covers the rest of the section.
Why aim matters as much as brightness
A headlamp must put light where the driver needs it. A beam pointed too low can leave the road ahead dark even when the pavement immediately in front looks bright. A beam pointed too high can send light toward approaching drivers instead of keeping it on the roadway. More light output alone does not correct either problem.
The lens, reflector or projector, and light source work together to form the beam. An adjustment changes where that pattern lands; it cannot repair damaged optics or make an unsuitable replacement bulb produce the intended pattern. Before turning an adjuster, check the lamp's condition and confirm that the installed light source matches the vehicle's instructions. The guide to halogen, LED and HID headlights explains how the light source changes the beam, and the guide to LED retrofit bulbs in halogen housings covers why a mismatched bulb can scatter light no matter how the lamp is aimed.
Signs that headlight aim needs attention
Look for a change from the vehicle's usual lighting pattern, especially after work on the front end. One symptom rarely proves the cause. A dim area may come from a deteriorated lens, while an uneven beam may involve bulb seating, mounting, or adjustment.
| Symptom | Likely cause | Action |
|---|---|---|
| The road ahead looks dark, but nearby pavement is bright | Low aim or an altered beam pattern | Check the pattern and compare it with the vehicle’s aiming instructions. |
| One beam appears noticeably higher than the other | Uneven adjustment, bulb seating, or mounting | Inspect installation and mounting before adjusting. |
| Other drivers repeatedly flash their lights during low-beam use | Possible high aim or excessive glare | Check loading, lamp condition, and low-beam aim. |
| The beam changes after carrying heavy cargo | A change in vehicle attitude | Recheck with the vehicle loaded as specified for aiming. |
| The pattern looks scattered after bulb replacement | Incorrect seating or an unsuitable light source | Confirm the specified bulb and correct installation. |
| The pattern moves or will not stay adjusted | A mounting, adjuster, or suspension problem | Have the underlying fault checked before another adjustment. |
Flashes from other drivers are a reason to investigate, not a measurement of aim. Check that high beams are off, then examine the low-beam pattern under controlled conditions.
Load, suspension, and built-in leveling
Headlamps point with the vehicle body. Cargo or a suspension change can alter the body's angle and move the beams even though nobody has touched the adjusters. An aiming check made under the wrong loading conditions can therefore give a misleading result.
If the lighting changes mainly when the vehicle carries passengers or cargo, compare those conditions with the manufacturer's aiming instructions. If the vehicle sits unevenly or the aim keeps changing, have the suspension and lamp mounts checked. Repeated adjustment can hide the symptom without resolving its cause.
Some vehicles have built-in leveling features. Check the owner's manual for their operation and any required settings or service procedures. Leveling does not establish that a damaged or incorrectly installed assembly is properly aimed. Likewise, the functions described in this guide to adaptive headlights should not be treated as a substitute for checking the underlying headlamp installation.
Recheck after lighting work
Bulb or assembly replacement
After changing a bulb, inspect the resulting pattern before assuming an adjuster needs turning. A bulb that is not seated as intended can alter the light distribution. Confirm the type designation in the owner's manual and review the installation points in the headlight bulb replacement guide. Replacing a complete assembly also warrants an aim check because the mounting and optical assembly have been disturbed.
Lens restoration
Restoring a yellowed lens can change how much light passes through it, but a clearer surface does not establish correct aim or acceptable glare. Check the pattern afterward and assess whether the assembly still produces useful illumination. The headlight restoration guide explains why appearance alone is an incomplete measure of the result.
Fog lamps
Fog lamps are a separate lighting system with their own rules. The fog light rules and aim guide covers how they are handled in New York, including aim.
When a shop check makes sense
Have a shop check aim when the wall pattern is unclear, the adjusters are inaccessible or damaged, an assembly is loose, or the vehicle requires a procedure you cannot follow reliably. Explain what changed and when: a bulb replacement, restoration, front-end repair, or load-related complaint gives the technician a useful starting point. The New York inspection lights guide describes what is looked at on lamps at inspection.
VTL section 375 also says headlamps must be applied and adjusted in accordance with the requirements of the certificate approving their use, which is another reason to follow the manufacturer's procedure over a generic one. This guide is informational and is not legal advice. Verify questions about New York requirements and their application with the DMV.
Aiming is also part of evaluating the complete lighting system. IIHS headlight testing measures illumination and low-beam glare with vehicles as received from the dealer, without aim adjustment. IIHS measures glare for oncoming drivers at 3 feet, 7 inches above the ground, and counts illumination out to where light falls to 5 lux, measured 10 inches above the ground. A particular vehicle's lamp condition and adjustment still deserve attention.
Frequently Asked Questions
How far from the wall should I park to aim headlights?
Many do-it-yourself guides use 25 feet, which also matches the distance in New York's beam rule. Your owner's manual may specify a different distance, so use that figure if it gives one.
Can I adjust headlights myself?
Yes, on most vehicles with accessible adjusters, using the manual's procedure. Park on level ground, set the tire pressure and fuel level, and adjust one lamp at a time. If the adjusters are broken, inaccessible or the aim will not hold, have a shop check the mounts.
Do headlight adjusters move the high beam too?
On most vehicles they do. Adjusting the low beam also moves the high beam, so there is usually no separate high-beam setting to make.
Can brighter bulbs fix headlights aimed too low?
Additional output does not correct beam direction. Check the installed bulb, lamp condition, and aim before choosing a replacement.
Should both headlights show an identical pattern on a wall?
Use the vehicle's specified reference pattern and procedure. A visible difference deserves checking, but do not assume every part of both patterns must match.
Does automatic leveling eliminate aim checks?
No. Check the manufacturer's instructions, particularly after assembly replacement or work affecting vehicle attitude.
Can I use the New York beam-height limits as the complete adjustment procedure?
No. The 25-foot and 75-foot figures are upper limits. Follow the vehicle's aiming procedure for the correct setup and adjustment method, and verify questions about the legal requirements with the DMV.